
Step 1 Organize your registration material.
Step 2 Choose your courses.
Step 3 Build your schedule.
Step 4 Access the registration system.
Step 5 Pay fees.
Step 6 Validate your Student ID card.
Step 7 Confirm your registration after classes begin, and particularly if you have made any changes through the add/drop process.
To access the student self-service page on the web, you must be using a browser with the minimum capabilities of Netscape Gold 3.0 with the recommended version being Netscape Communicator 4.5 OR Internet Explorer 3.0 with 4.0 recommended. If you need to upgrade your current browser, you may do so through the browser homepages, home.netscape.com or computingcentral.msn.com . If you are having difficulties, please call the Information Technology Services Helpdesk Ext 4440.
If you do not have access to a computer at home you might try one of the following options:
the Student Microcomputer Lab on campus.
the Office of the Registrar lobby.
the Student Information Resource Centre [CAW Student Centre].
use a friend's.
register from work.
most libraries [usually you are limited to ½ hour].
an Internet café.
It is to your advantage to register as soon as possible after your permit-to-register date.
You need the following to register:
Calendar - for academic regulations, course descriptions and prerequisites. You will receive one at Head Start and it is also available on the web from the registration screen.
Course Offerings Newspaper (The Spirit) - for class times and locations, for course enrolment conditions or restrictions besides the prerequisites in the Calendar, for Web instructions and worksheets, and for fee payment instructions.
Web Registration Notification - to find out when you may begin to register. This is available on the student self service page on the web.
DARS - to determine what courses are required to complete your program requirements for graduation. This is available on the student self service page.
Pencil and Paper - to make notes before and during your registration session.
Check your DARS to determine which courses are required in your program and the Calendar and Course Offerings to ensure that you qualify for each course you choose.
Prerequisites
You must meet all prerequisites. You will be blocked from registering in a course for which you have not completed the prerequisites as listed in the University Calendar. Otherwise, you may enrol only with the instructor's permission on the add/drop form.
Course Restrictions
Check the Course Offerings for any messages under the course number. You must meet the stated enrolment conditions. You will be blocked from registering in a course for which you lack the conditions. Otherwise, you may enrol only with the instructor's permission by using an add/drop form.
Course Load
Students cannot register in a course overload through the telephone registration system. Overload courses require the approval of your Dean and must be added after classes begin through the drop/add procedure. Attempting to register in a course overload will delay the completion of your registration.
Use the Timetable Worksheet provided in The Spirit to build a conflict-free schedule. NOTE BOTH CLASS AND FINAL EXAM SCHEDULES.
Hint: Note which courses have the least choice of sections and build these into your schedule first. Plan alternate sections/courses in case your first choices are not available.
Arrange your course selections and alternates on your worksheet. When you're satisfied that your schedule is complete and CONFLICT FREE, go to Step 4.
You may enter the system anytime AFTER your Head Start appointment, but NOT BEFORE. The operating hours of the system are Monday - Saturday 8:30 a.m. - 12:00 Midnight and Sunday Noon - Midnight.
Web registration ends at midnight on Monday, September 4th . However, you may still use the web to confirm your registration or to check for open courses and schedules throughout the term.
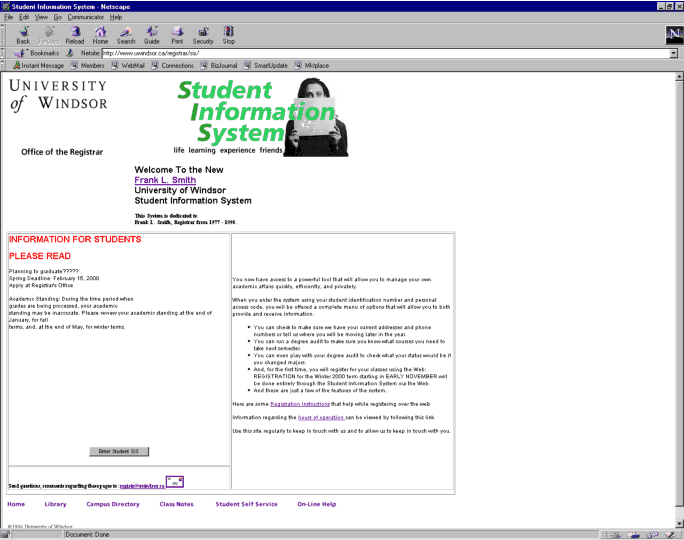
a] Go to the University of Windsor Homepage at web2.uwindsor.ca and select the Student Self Service link at the bottom of the page.

b] Always read the information on this first screen, during the year important messages may be there for you to view. Click on the 'Enter the student sis' button on the bottom of the Student SIS Web page.
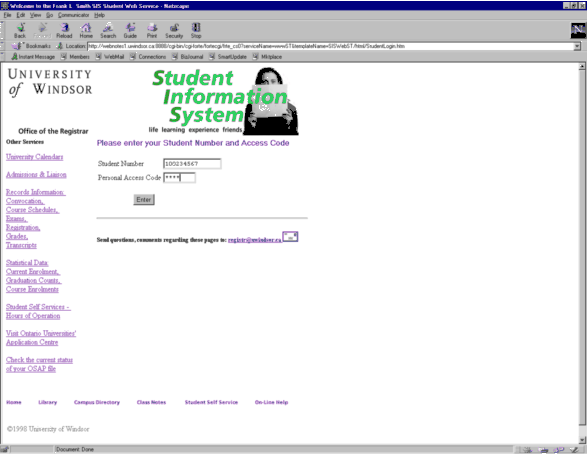
c] Enter your Student Identification Number and your Personal Access Code. Click on the ENTER button
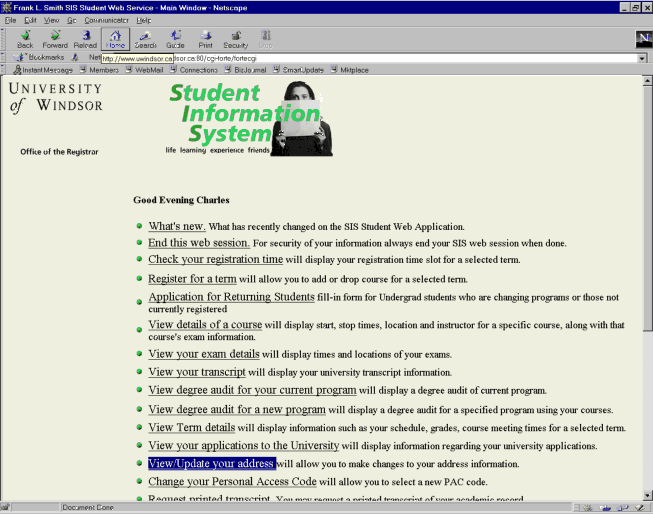
d] You are now in the student self service page. Important: Please verify your Address by clicking on the View/update your address link.
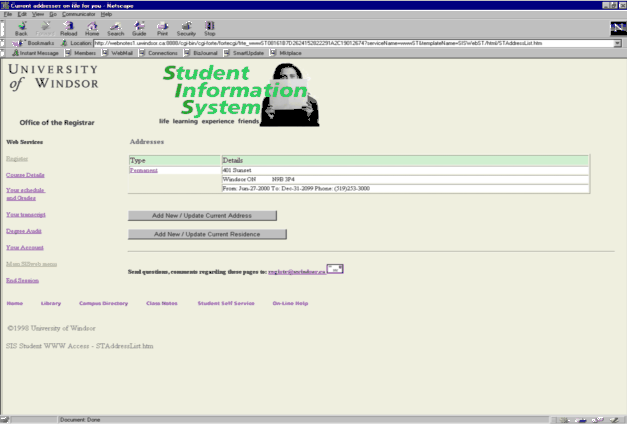
e] You may up-date your Permanent Address , your Mailing address (if different from the permanent) or your Residence Address (if you are living in an on-campus residence). If you are planning a move in the future, you may make the effective date for any of these addresses in the future.
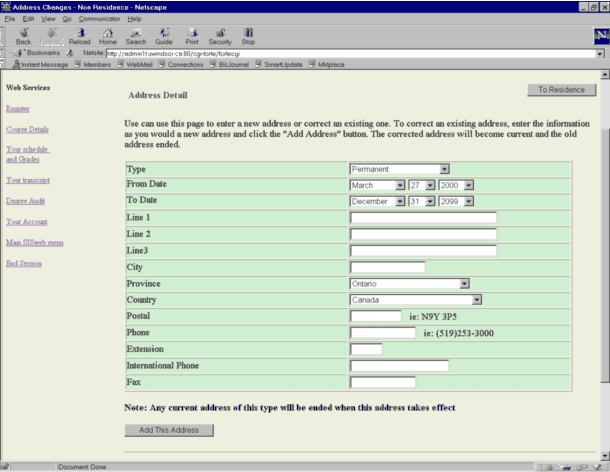
Once you have updated your address return to the registration screen by clicking Register in the left hand frame.
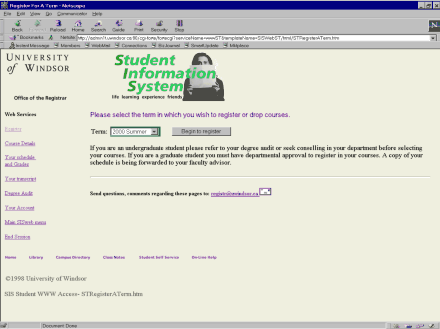
f] Select Fall 2000 from the drop-down TERM box and click on Begin to Register.
g] You will be asked to verify that we have you listed in the proper program.
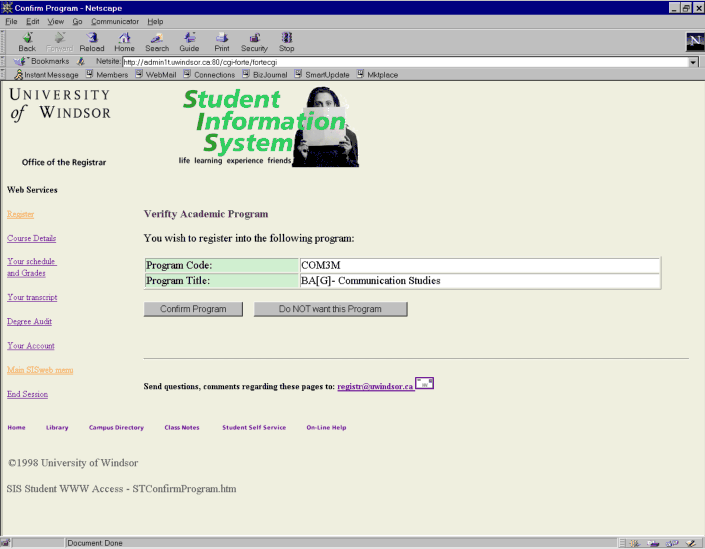
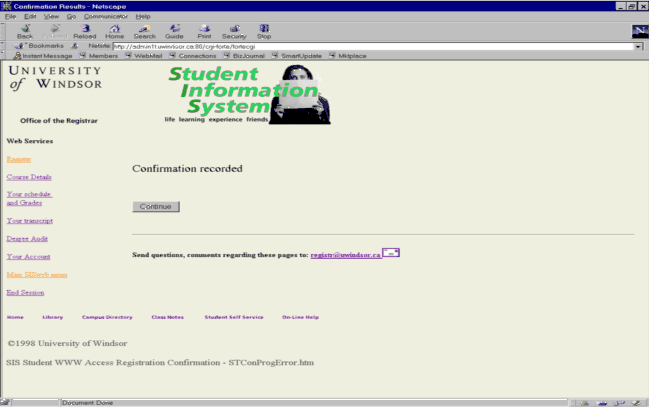
If the program is correct, please click on the confirm button.
Then click on the Continue button.
h] On the first line of this next page, a list of courses in which you have already registered will be displayed. This will be empty until you have registered
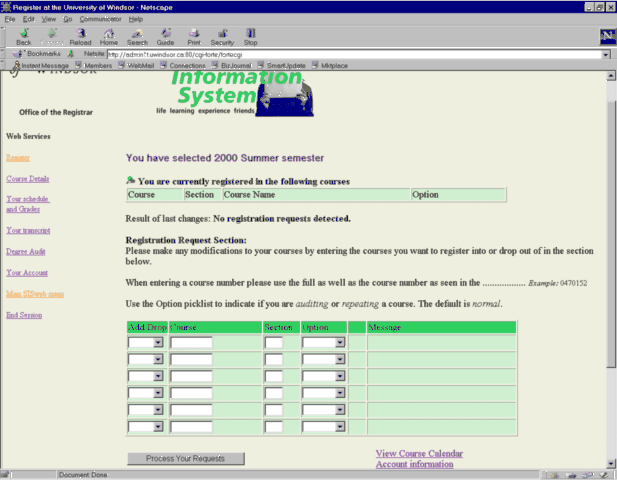
i] On the first line of the Registration Request Section select the add button on the drop-down box in the add/drop column. Tab to the course column and enter the 7 digit course number (e.g. 0246115). Tab to the section column and enter the section number (e.g. 01). In the option column choose Normal or, if you are repeating the course or wish to audit it only, select either Audit or Repeat from the drop-down box.
j] Continue adding additional courses on the additional lines of this section.
k] Once you have added all your courses YOU MUST CLICK THE PROCESS YOUR REQUEST BUTTON. The system will take a few seconds to process your requests. The screen will be refreshed and your list of registered courses will now appear in the currently registered section.
l] The results of your request can be viewed in the Registration Request Section. If you were successful in registering in a course, the message 'course added' will be displayed with a 'thumbs-up' picture. If you were unsuccessful in getting registered in the course, you will see a 'thumbs-down' picture with the reason why you could not get the course.
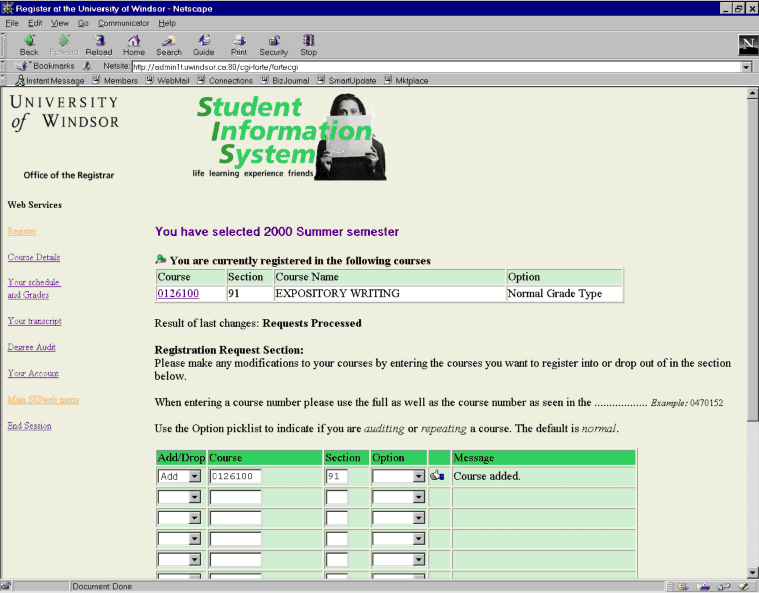
These reasons include:
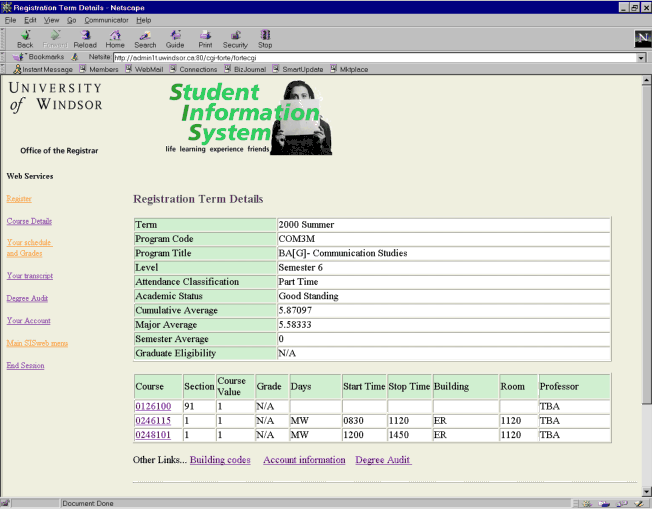
m] Once you are done registering, select the Your schedule link and record or print your schedule for future reference.
All fees (including tuition, incidental & society fees, and residence/meal plan fees) must be paid on or before August 15, 2000.
Daily interest charges begin on August 16, 2000. If satisfactory fee payment arrangements have not been made by the deadline date, it will not be possible to make further course changes by the add/drop procedure.
Payment at the Bank
You may pay your tuition at any branch of a chartered bank in Canada. Follow instructions on the Student Payment Form, which is available at various centres around campus (the CAW Student Centre, the Student Information Centre, the Residences, or the Office of the Registrar) or request one from the Cashier's Office by phone 253-3000 Ext 3307, 3308 or 3309 or by email cashiers@uwindsor.ca or fax at (519) 561-1434.
Electronic Banking
Electronic banking by either telephone or web is available for Scotia Bank, Toronto Dominion, Bank of Montreal, Royal Bank, and CIBC customers. Please contact your bank for further details. Your Student Account Number to be used is your current 9-digit University of Windsor Student I.D. Number.
Payment by Mail
You may pay by mail using a Cheque or Money Order made payable to the University of Windsor. Please write your student ID number of your cheque or money order, and include the top section of the Bank Payment form with your remittance. PLEASE DO NOT SEND CASH IN THE MAIL OR PUT CASH IN THE DROP BOX.
If paying by mail, mail to: University of Windsor
Cashier's Office
401 Sunset Avenue
Windsor, ON N9B 3P4
Payment in Person
You may pay in person in the Cashier's Office located on the first floor of Chrysler Hall North by cash, cheque, bank draft, debit card or money order between the hours of 9 a.m. - 4 p.m. You may visit this office during Head Start. Please note that if you choose this method of payment close to the published due date, you may be faced with a 30 to 60 minute wait caused by long lines and necessary paperwork. It is recommended that one of the alternate payment methods listed here be used if possible.
Payment by OSAP
To avoid paying a late payment penalty, if you are paying your fees with OSAP, you must claim the first instalment of your award between the hours of 9:00 a.m. and 3:00 p.m. in Salon B/C of the CAW Centre according to the following schedule:
WEEK 1 WEEK 2
A-G Sept 6 A-G Sept 12
H-O Sept 7 H-O Sept 13
P-Z Sept 8 P-Z Sept 14
A-Z Sept 11 A-Z Sept 15
If you applied for OSAP after the deadline date, your fees must be paid by August 15, 2000 to avoid daily interest charges. If your OSAP award is not sufficient to cover your fees owing for the Fall semester, it is your responsibility to ensure that you have paid the difference by August 15, 2000. This difference will be subject to daily interest charges.
Step 6: Validate Your ID Card
ID cards may be validated at the Cashier's Office or the CAW University Centre. You may do this during Head Start.
Step 7: Confirm your Registration
The University no longer mails out confirmations of registration.
You can use the Student Self-Service web site (web2.uwindsor.ca/registrar/sis) to confirm your current registration status at any time.
Answers To Frequently Asked Questions About The Web Registration System
Q:What if I cannot get access?
A:It may be that all connections to the university server are busy. Please keep trying to get a connection. Make sure that you are using your correct student identification number and your proper access code. If you attempt to sign on too many times, you will be barred from further attempts. If this happens to you, please call the Office of the Registrar for assistance.
Q:What if I get the message that I do not have approval to register for this term?
A:If you are not registered in the current term, you will not have an appointment time assigned to you to register in the next term. Call the Office of the Registrar to have an appointment time activated for you.
Q:What if I realize that I have entered a wrong number?
A:If you have already pressed the ENTER button, you must wait until the error message Invalid access code is shown. You will be asked to enter the correct information again. You will only be given three chances to enter this information correctly and then you will be blocked from registration. So please be careful!
Q:How do I check that I registered correctly?
A:After you have finished entering your courses, a full list of your registered courses will be displayed. If you wish to view your schedule, click on the View your schedule link in the left-hand frame. Select the appropriate term and click on the VIEW DETAILS button.
Q:What if a course or section I want to take is full or cancelled?
A:You should choose another course or section to complete your timetable. Click on the Course Details link in the left-hand frame to determine which sections are still open. You may access the system periodically to determine if additional sections have been opened or you may wait until classes have begun and try to receive approval to register during the drop/add period.
Q:What if the computer "goes down" while I am registering?
A:Once you have clicked on the PROCESS YOUR REQUEST button, all courses that are confirmed to be added are saved on your record. Any information you may have entered before clicking on the PROCESS YOUR REQUEST button will not be saved. When you access the system later to continue registration, make note of the courses listed to make sure that none are missing.
Q:What if the course the computer reads back to me is not the course I want to take?
A:You may have accidentally entered the wrong course number or incorrectly copied down the number from the Course Offerings. DROP the erroneous course by changing the ADD to DROP beside the erroneous course.
Q:What if I haven't completely decided on my final timetable, but I want to make sure I get the courses I have already picked?
A:You don't have to select all your courses at once. Access the system and select the courses you know you want to take. Access the system another day when you have the rest of your schedule worked out.
Q:Can I make changes to my schedule once I have registered?
A:YES. You may access the system to ADD courses until the Monday before classes begin. You may continue to drop courses over the web until the end of the eighth week of classes
If you have a full program, you must always drop a course before you can add another course since the system will not allow you to register in an overload situation. This applies to dropping and adding different sections of the same course.